Precision vs. Feel: Two Approaches to Tuning Your Morning Coffee
Tuning a daily coffee routine usually falls into two broad camps. One is recipe-led: precise measurements, timers, and repeatable steps. The other is tactile-led: relying on feel, sound, and taste to guide small adjustments. Both produce good coffee; they just get there differently. Below I compare the two approaches with small examples, then give practical guidance for choosing—or blending—them into a dependable habit.
Approach 1: Recipe-Led Brewing
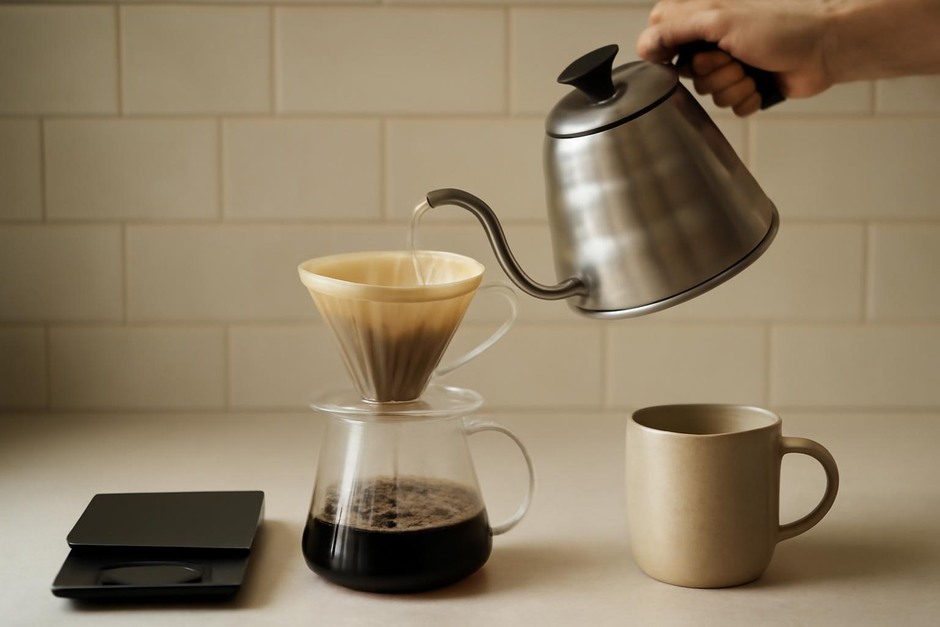
The recipe-led approach treats brewing like a simple experiment you can repeat and refine. You pick a set of variables—ratio, grind size, bloom time, pour schedule—and keep them consistent so you can isolate what changes taste.
Example routine
- Coffee: 18 g
- Water: 300 g (16.7:1 water-to-coffee)
- Grind: medium-fine (between table salt and sugar)
- Bloom: 30 seconds with 40 g water
- Pour schedule: three pours to 300 g total, finishing at 3:00–3:30
- Tools: scale, timer, consistent kettle and filter
Why it works: when you control variables, changes in flavor point back to specific adjustments. Want brighter acidity? Slightly coarser grind or shorter contact time. Want more body? Finer grind or a slower pour. The learning happens in measurable steps.
Pros:
- Highly repeatable: you can recreate a cup day after day.
- Quick diagnostics: numbers tell you where to adjust.
- Easy to share and document recipes.
Cons:
- Requires tools (scale, timer) and attention to detail.
- Can feel rigid; small, enjoyable variations may be treated as errors.
Approach 2: Tactile-Led Brewing
The tactile approach leans on sensory cues and habitual gestures. Instead of a scale or timer, you tune by how the grounds look, how the water flows through the bed, and how the resulting sip feels. Practitioners call this learning to “read the brew.”
Example cues
- Bloom: look for the grounds to swell and settle within ~20–40 seconds.
- Pour: observe the water forming a consistent vortex and adjust speed so the flow never breaks into unpredictable splashes.
- Sound: a steady, hollow hissing slows near the end; a loud, fast drip suggests too-coarse grind or too-fast pour.
- Taste: if the cup feels thin and sour, slow down your pour or use a finer grind; if it’s muddy, coarsen and speed up slightly.
Why it works: these cues are immediate and adaptable. You learn patterns—what a good pour looks like for a particular filter, or how long a bed takes to finish when you pour with a certain motion—and you can respond on the fly.
Pros:
- Flexible: you can adapt to variables like humidity, different beans, or a noisy morning without measuring instruments.
- Engaging: it builds practical coffee intuition and a more tactile morning ritual.
Cons:
- Less repeatable across days; progress is harder to quantify.
- Can take longer to learn because cues are subtle at first.
How to Choose (or Use Both)
Pick an approach based on your goals, available time, and what you enjoy about coffee.
- If you want consistency and quick diagnostics: start with a recipe-led method. Use the example routine above for a week. Keep notes on one variable at a time—grind one step finer, adjust bloom volume, or alter total brew time by 30 seconds—and observe the effect.
- If you want skill and a sensory ritual: practice tactile brewing. Skip the scale for a few brews and focus on the bloom, sound, and pour flow. Taste after each adjustment to link the cue to the result.
- If you’re short on time but like reliable flavor: use a simple recipe (e.g., 16–17:1 ratio, 3-minute brew) and apply one tactile check—watch for a steady flow and an even bed at the end.
- If you like experimenting with beans: combine both. Use a recipe to establish a baseline, then switch to tactile adjustments to adapt to specific roast levels or bean origins.
A simple two-week experiment
- Week 1: Follow the recipe-led example for all morning brews. Record three details: grind setting, total brew time, and one tasting note (acidity, sweetness, body).
- Week 2: Use tactile cues instead of the scale. Try to reproduce the Week 1 cup by matching bloom, pour speed, and sound. Record the same three details plus one sensory cue you relied on.
- Compare notes: which approach gave you more consistent cups? Which felt more satisfying to perform?
Most home brewers eventually blend the two: a set of reliable numbers to start, and tactile checks to adapt. That balance keeps your mornings both predictable and alive—precise enough to be dependable, tactile enough to remain interesting.